Sunday 7 September 2008

Mochiko

I've realised that if you take photos of food and it looks like shit, people will be less likely to want to try it. Which is silly really - unattractive food often tastes the best.

I had a spell of glutinous rice fever, so here are two recipes for mochi which I've never tried before.

Mochi bread

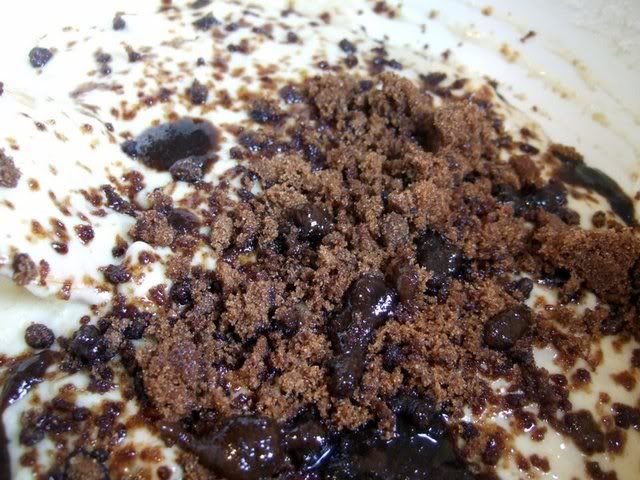
I only had green flour in the house (coloured with pandan extract, it's better than putting food colouring in) so I headed to Mare Street to my nearest oriental supermarket, which is Vietnamese. I also ended up getting some flour mix for making Vietnamese crepes, so I'm going to try that some time soon. The mochi bread tasted really good - hard on the outside and sticky on the inside - although next time, I think I'd either make it more sweet by adding chocolate/sweetened red beans, or completely savory. Also, I think if I used brown sugar (or even the green flour) it would have looked much nicer, but I will reiterate the point I made earlier about unattractive looking food :)

Ingredients
100g glutinous rice flour (mochiko)
20g plain flour
1 tbsp soy flour or cheese powder (parmesan cheese or a fake equivalent will do)
1 tbsp milk
200ml water
40g sugar
1/2 tsp salt
30g butter
1 egg, beaten

Method
1. Preheat the oven to gas mark 4/180C
2. Sieve the flours, cheese powder and baking soda into a bowl
3. In a saucepan, boil the water and add the salt and butter. Once the butter has melted, slowly add the mixture to the flour to form a dough.
4. Slowly stir in the milk and beaten egg. If the dough isn't moist enough, or there's still flour at the bottom of the bowl, add a bit of water or oil.
5. Shape into balls and place on a baking tray lined with baking parchment (the original recipe said something about using a piping bag, but it is completely unnecessary!)
6. Bake for 15-20 minutes, then reduce the temperature to gas mark 3/160C, and bake for a further 10 minutes.

Mochi ice cream

This is just normal mochi daifuku, but frozen with an ice cream filling inside. There are lots of recipes online for making mochi, but loads tell you to do it in a microwave...WHY?! It's so much easier on the stove, at least then you can tell when it's done, and you don't need to worry about it exploding, burning or drying up. I have done enough stupid stuff with microwaves on impulse so the risk of messing it up is pretty high for me.
Ingredients
1 1/2 cups glutinous rice flour (mochiko)
1 1/2 cups water
1/2 cup caster sugar
Lots of potato starch
food colouring and a splash of vanilla essence (optional)
ice cream
Method
1. First, thaw the ice cream so it is soft (but not runny). Mould into small, teaspoon size balls, and pop back into the freezer so they freeze fully again.
2. Combine the flour, water and sugar in a pan, and stir it a little.
3. Heat the mixture on a moderate heat and stir continuously. It will thicken and become gelatinous quite quickly, and will then stick together in a big lump and become difficult to stir.
4. At that point, transfer the mochi from the pan onto a surface or chopping board which has been dusted with potato starch.
5. Once the mochi has completely cooled, take the frozen ice cream balls out of the freezer. Use a small cookie cutter to cut out bits of mochi and mould it around the ice cream (you need to do this quickly, because the ice cream will start to melt). Make sure your hands are always covered in potato starch, otherwise it'll just stick everywhere and you'll end up with a mess.
6. Transfer to the freezer and wait until the ice cream has frozen completely before eating. If the ice cream melts before you have time to pop them in the freezer, your mochi will be flat, but it isn't that much of a big deal.

--

I found this and figured the reason it was unpublished was because I never took any photos of the ugly mochi ice cream and uglier mochi bread. Whoops. I did, however, find a photo of the Vietnamese pancakes (Banh xeo) I made, which were also pretty ugly, so still appropriate for this post, I think.


If you would like to try making this ugly pancake, there's a decent recipe here. Resist the temptation to be sparing with the oil (if you tend to do that) as otherwise the pancakes won't be crispy!

Hope you enjoyed this ugly post.

Monday 1 September 2008

Ice cream (without an ice cream maker)

Up until a few months ago, I'd never even considered making ice cream, as I thought it'd be far too difficult without an ice cream maker. Then, one of my friends at uni mentioned to me that she'd made some strawberry ice cream and how easy it was, so I hastily asked her for her recipe and tried it out myself. Despite not having an ice cream maker, it turned out perfectly, and guess what...no running to the freezer to stir it every half hour either! I found out that because of the absence of milk, there's no issue of ice crystals forming (thanks, BBC Food).

This is the basic recipe, so you can add whatever flavouring you like...be inventive! Here are some ideas which deviate somewhat from the bog standard chocolate, vanilla and strawberry - avocado, lavender, peanut butter and chocolate, cheesecake (cream cheese, biscuits, fruit), chocolate orange, green tea, sweetcorn, sharon fruit, rose, wasabi (I saw this in Japan but unfortunately didn't get a chance to try it!), sweet potato.

Ingredients
300ml of double cream
3 eggs
3 desert spoons of sugar (30g)
Flavouring of your choice

Method
1. Whip the cream until it is thick.
2. Separate the eggs, and beat the yolks. [I have made a separate post with some tips on dealing with egg whites for people who aren't sure - it isn't that important for them to be perfect for ice cream, but matters a lot more when making cakes that require separated mixtures]
3. Beat the whites with the sugar until they form stiff peaks
4. Mix the egg yolks and cream together and fold in the whites.
5. Next, fold in your flavouring. If you're using fruit, you should puree it in a food processor before adding it to the mixture. Just adjust to your taste - as a rough guide, I'd use between 250 and 500ml of pureed fruit, depending on how strong the flavour of it is. I also added some hundreds and thousands to mine to make it cute ^^
6. Transfer to a suitable container, stick in the freezer, wait until frozen and EAT!

Friday 29 August 2008

Egg flour drop soup

I saw this recipe in the Daily Telegraph when I was having coffee with a friend. The article actually caught my eye because it was written by a Chinese woman for another woman who claimed she doesn't like Chinese food, and well, I found that hard to believe, because Chinese food is amazing. There were two recipes in the article, and I noted both down, but tried this one out since I had some silken tofu which hard been sitting around at home.

Although the ingredients are pretty basic, it tasted good, and was very filling, and was extremely quick to make! I'd say the recipe is good for 2 people for a main course, or 4 people if you want it as a starter.


Not at all photogenic, but tastes great!

Ingredients
3 tomatoes, sliced and the skin removed
2 eggs, beaten
1-2 sheets of nori seaweed, shredded
200g of firm silken tofu, diced into 3cm cubes
2 spring onions, sliced
A handful of spinach
1 tbsp sesame oil
1 tbsp soy sauce
1 pinch of white pepper
1 tbsp of cornflour/potato flour mixed with 2 tbsps of cold water

Method
1. Put the stock in a pan and bring to the boil. Turn down to a moderate heat, and the tomatoes to the stock.
2. Pour in the beaten eggs and stir gently. Briefly leave the soup to allow the eggs to partially set, and add the soy sauce, sesame oil, pepper and flour mixture.
3. Add the nori and tofu, and continue to heat for one minute.
4. Add the spinach and spring onions, and heat until these are just cooked, then serve!

Tuesday 26 August 2008

Banana bread

I can't say bananas are one of my favourite fruits, but banana bread...mmm. It is totally underrated as a cake, I think. I had some bananas that were a bit too ripe, so decided to make it, and it came out really delicious. The only problem is that I couldn't be bothered to lower the oven shelf, so put it on the higher one thinking it'd be ok, and the top burnt a little, so it wasn't very photogenic banana cake.


Adding sugar to the mixture...I used muscovado as there wasn't any cater sugar to be found.

Banana Bread (from BBC food, and tweaked a bit)

Ingredients
225g/8oz self-raising flour
100g/4oz butter
150g/5oz caster sugar
450g/1lb bananas (the softer the better), peeled and mashed
½ tsp salt
2 eggs
175g/6oz mixed dried fruit (I just used sultanas)
1tsp vanilla essence

Method
1. Pre-heat the oven to 180C/350F/Gas 4.
2. Mix all the ingredients except the dried fruit together. You can do this in a food processor or by hand in a basin.
3. When they're all thoroughly mixed, add the dried fruit. Spoon the mixture into a 1kg/2lb non-stick loaf tin, spread it out evenly and bake it for one and a half hours. The loaf is done when a skewer pushed into its middle comes out clean.
4. Cool on a wire rack, then slice before serving.

Monday 25 August 2008

Kimchi

I was showing my friend how to make kimchi today, and we took step-by-step photos. I told her I'd upload these pictures somewhere so she can use them as a reference for next time, and then I thought..."I like cooking, taking pictures of food and swapping recipes with people. I have a bunch of food blogs which are bookmarked. Why don't I make one too?" So I did!

If you're not familiar with it, kimchi is a Korean fermented vegetable dish, the most common type made with cabbage, which is the type this recipe is for.

This is possibly the most comprehensive method to making kimchi on the internet, so you shouldn't run into any problems...but if you do need clarification about anything, please don't hesitate to ask :) The recipe is for 2 medium sized Chinese cabbages (25-30cm tall). Apologies for the American cup measurements, but this really doesn't need to be accurate, as you can tweak it to your individual taste.

Ingredients

2 Chinese cabbages
2 medium sized onions
Half a bunch of Chinese chives
A 2-3cm long piece of ginger
300g mashed frozen garlic
1 Asian pear
1/2 cup of fish sauce
1 cup of Korean chilli powder (gochugaru)
1 1/4 cups of coarse salt (yes, I know this sounds horrendous, but don't worry!)

Method

1. Cut the cabbages into quarters. Dissolve 1/2 a cup of salt in 1L of water, and pour into a large container (A washing up bowl is perfect, as it's large enough that nothing will spill out when you're mixing later on). Dunk each quarter of cabbage into the water, making sure that the whole thing gets wet before you remove it. Repeat for all the pieces of cabbage.


2. Drain the salt water from the container, and then sprinkle the coarse salt (about 1/3 of a cup) all over the pieces of cabbage, making sure you get it in between the leaves. We didn't use all the salt, so you need to use your discretion here; it should only be a thin layer. Just to clarify, quite a lot of this salt will be washed off later...although kimchi is salty, it's not THAT salty!


3. Cover the container that the cabbages are in, and make sure pressure is applied on top.


Note the very advanced method we used, as is shown in the picture. Then leave it for 5-6 hours...use this opportunity to relax and take time out from the world (or to go buy the rest of your ingredients if you haven't already).

Once the cabbages are done, they should be floppy, and you should be able to squish the leaves without them crunching and breaking.

4. Rinse the cabbage of the salt, squeeze the water out of the leaves, and place in a colander to let the excess water drain off.


5. While the cabbages are draining, start chopping the other vegetables. Sorry about the slightly anal measurements, they're simply there as a guide, so you don't end up eating a fat piece of ginger whilst eating your kimchi (if you love big chunks of ginger, then by all means cut it larger).


Onions (thin strips) Chives (2cm lengths)


Pear (peel, core and chop into matchsticks...yes, I fully admit I was shit at cutting this pear, I couldn't find the corer and it ended up all odd and wonky)


Ginger (1cm strips)


6. Transfer the veggies to the container which the cabbages were in. Add the garlic - We went to the Korean food shop and bought a box of frozen crushed garlic, as we are lazy. If you're putting in fresh garlic, I'd say put in 1-2 bulbs, as this will be stronger.


Add the fish sauce - Although it's better to use Korean anchovy extract, we used Thai fish sauce, as I had this at home and we are poor students on a budget :)


Add the chilli pepper - This we did buy from the shop, as I really don't know about how good it is to substitute the pepper. If you need to, I would research this, as the hotness of different types of chilli peppers range, so you'd need to adjust the recipe.


[We also added a bit of water, to make the mixture a bit more paste-like]

7. Cover the cabbage quarters with the mixture. You might want to use gloves, as it'll get messy, and reduce the risk of killing your eyes when you rub them later on, after not removing every trace of chilli from your hands. Make sure you coat all the leaves, and stuff some of the other vegetables in between them.


Then fold the floppy, greener leaves at the top of the cabbage underneath it and place in a large, airtight container.


Repeat, and then cover the cabbages with the rest of the mixture.


8. Cover the top of the container with cling film, close the lid, and leave in a cool, dark place for 1-2 days. Then transfer the container to the fridge, and leave for a few more days before eating (just use your own judgement, if you're interested in making this, chances are you know what kimchi should taste like. If you don't think it's done then leave it a little longer).

And here's some I made earlier...