Showing posts with label cake. Show all posts

Tuesday, 27 April 2010

Tiramisu cake

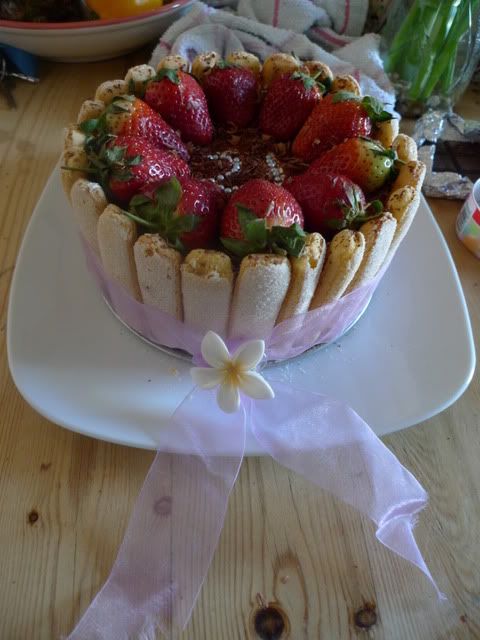
It was my friend's 21st last week, so me and my other friend decided to join forces and make her a cake.

Photobucket

I lie though, because this isn't strictly a cake, but actually tiramisu stacked with lots of sponge fingers. It's actually a really simple thing to do, and great for people who don't have a lot of confidence in their oven (see my post "death of a chocolate cake" if you're wondering what I mean).

Tiramisu cake (makes a 7" cake)

Ingredients

Espresso Syrup:
1 tablespoon strong instant coffee powder or espresso powder
1/2 tablespoon sugar
1/2 cup (125ml) boiling water
1 tablespoon Tia Maria or brandy

Filling:
250g mascarpone cheese
1 1/2 teaspoons vanilla extract
3 tablespoons icing sugar
2 tablespoons Tia Maria/brandy
1 cup (250 ml) double cream

Sponge fingers (I bought 2 packs of 24 and used 30ish. If they are thicker than the standard sponge fingers you get in the supermarket then obviously you won't need as many)
50g dark chocolate


dark chocolate shavings(optional)
strawberries for decoration (optional)


Method:

To make the Espresso Syrup:
1. Dissolve instant coffee powder and sugar in boiling water (or make your espresso with the 1/2 cup of boiling water).
2. Leave to cool, then stir in 1 tablespoon of brandy. Set aside.

To make the Filling:
1. Whisk mascarpone cheese with icing sugar, vanilla extract, brandy and 3 tablespoons of the espresso syrup until blended.
2. Whisk the whipping cream until it forms soft peaks (I'd reccomend using an electric mixer, but be careful not to over whip).
3. Mix in 1/4 of the whipped cream to the mascarpone mixture, then carefully fold in the remaining whipped cream to the mascarpone with a spatula.

To assemble the cake:
1. Line the sides of a 7" round cake tin (either springform or with a removable base) with the sponge fingers (do not dip them in the espresso syrup). If the last sponge finger doesn't fit nicely then trim it so it fits in. Cutting off the ends will help them to stand up if they keep sliding around.
2. Gently dip the remaining sponge fingers one at a time in the espresso syrup, and use them to line the base of the pan. Cut them into shorter lengths to fill the whole of the circular base.
3. Spoon half the filling on top, spread evenly and grate dark chocolate over it.
4. Repeat with another layer of dipped sponge fingers and spoon over the remaining filling.
5. Cover and refridgerate for at least 4 hours (but preferably overnight).
6. Before serving, remove the sides of the cake tin, grate over more dark chocolate. If you want large chocolate shavings you can use a potato peeler. Decorate with strawberries. We also added silver balls cos they are awesome.
7. Add a ribbon, candles and surprise someone in the venue of your choice :)

Monday, 15 March 2010

Death of a chocolate cake

It might seem odd that I've decided to blog about a chocolate cake which was initially a failure...but that's only because with the help of my flatmates, I managed to salvage it and turn it into something beautiful. Well, ok, something.

Anyway, my plan was to make a chocolate layer cake for my friend's birthday. It was going to be decorated with chocolate curls, ganache and strawberries. It was going to be a work of art in sponge cake form. 6 bars of chocolate...off I go. I thought I would it would be the decorating stage where something went wrong, but unfortunately I never got there, because our bitch of an oven decided to burn the top of the cake whilst leaving the middle undercooked (I think I should do a separate post about our bitch oven, as we've lost so many cakes to that thing). I didn't know that some of the sponge was still slighly raw, and only found out when trying to slice the cake into layers, which caused it to crack.
"Shit! Fuck! Damn! dsdhfudthruoghdooshdygh. Whyyyyyyyyyyyyy?!?!"

I doubt anyone wants to hear about the minature fit I had in the kitchen that day, but I couldn't let that chocolate sponge go to waste (most of it was fine). So I took a knife to the already quite dead cake and cut it into bite sized pieces, layering them in a bowl with chocolate cream and strawberries.


(yeah ok, I admit it, I did only just post this so I had an excuse to draw faces on those strawberries)

There was still quite a bit of sponge left, and I did actually want something resembling a cake, even if it was going to be tiny. So I grabbed a heart cookie cutter and cut 3 hearts out of the remaining sponge, stacked them and decorated it with more chocolate and strawberries. It turned out a bit like one of those mini one-portion birthday cakes you can get in gift shops.


What was left was one layer of sponge, which had a rather strange shape due to bits being cut out of it. But it still had potential to be transformed...


...into a vomit cake! Crumbled biscuits were added to some chocolate cream for extra effect. Clearly my creativity knows no bounds.

I didn't actually give the vomit cake to my friend because I couldn't carry 3 cakes, so kept it for me and my flatmates to enjoy. Which we did, with beer. Thankfully no one actually vomited, because the cake tasted nice and the beer ran out before anyone got anywhere near to that stage. I'm not going to post the recipe for the chocolate sponge, since if you want to try this yourself it's not incredibly difficult to mess up baking a cake. My personal tips would be turning on the oven too high, adjusting the quantity of mixture but not adjusting the cooking time, or adding too much baking powder. Alternatively, get yourself a terrible oven like ours (if you're a student, chances are your shitty landlord has already provided one. Lucky you!).

There's no real moral to this story, but what I'm trying to say is that if something goes wrong in the kitchen, you can usually make the best of a bad job, and have some fun doing it at the same time :) Apart from if you put too much chilli in something. Adding water, sugar or yogurt can help up to a certain point, but after that you may as well chuck it in the bin before you end up killing your tongue eating it out of stubbornness.

Happy baking!

Tuesday, 26 August 2008

Banana bread

I can't say bananas are one of my favourite fruits, but banana bread...mmm. It is totally underrated as a cake, I think. I had some bananas that were a bit too ripe, so decided to make it, and it came out really delicious. The only problem is that I couldn't be bothered to lower the oven shelf, so put it on the higher one thinking it'd be ok, and the top burnt a little, so it wasn't very photogenic banana cake.


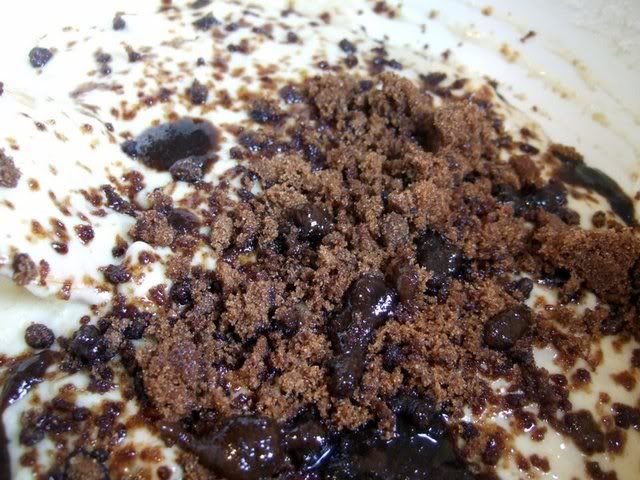
Adding sugar to the mixture...I used muscovado as there wasn't any cater sugar to be found.

Banana Bread (from BBC food, and tweaked a bit)

Ingredients
225g/8oz self-raising flour
100g/4oz butter
150g/5oz caster sugar
450g/1lb bananas (the softer the better), peeled and mashed
½ tsp salt
2 eggs
175g/6oz mixed dried fruit (I just used sultanas)
1tsp vanilla essence

Method
1. Pre-heat the oven to 180C/350F/Gas 4.
2. Mix all the ingredients except the dried fruit together. You can do this in a food processor or by hand in a basin.
3. When they're all thoroughly mixed, add the dried fruit. Spoon the mixture into a 1kg/2lb non-stick loaf tin, spread it out evenly and bake it for one and a half hours. The loaf is done when a skewer pushed into its middle comes out clean.
4. Cool on a wire rack, then slice before serving.